
Teams Bots
Give an employee its own Azure Bot, installed in Microsoft Teams under its own name.
Where
Dashboard sidebar → Settings → Connectors → Teams Bots.
What it does
A Teams bot is an Azure Bot of your own that represents one employee. Your team messages it in Teams, and the employee answers there.
One bot per employee. Add a second bot for a second employee. This is the longest connector to set up, it involves two Azure resources and an app installed in Teams, so plan a quiet half hour for the first one.
This is not Teams Impersonation. A bot speaks as itself; impersonation sends as a real connected Teams user.
The row shows how many bots are connected (0 connected until you add one).
What you will need
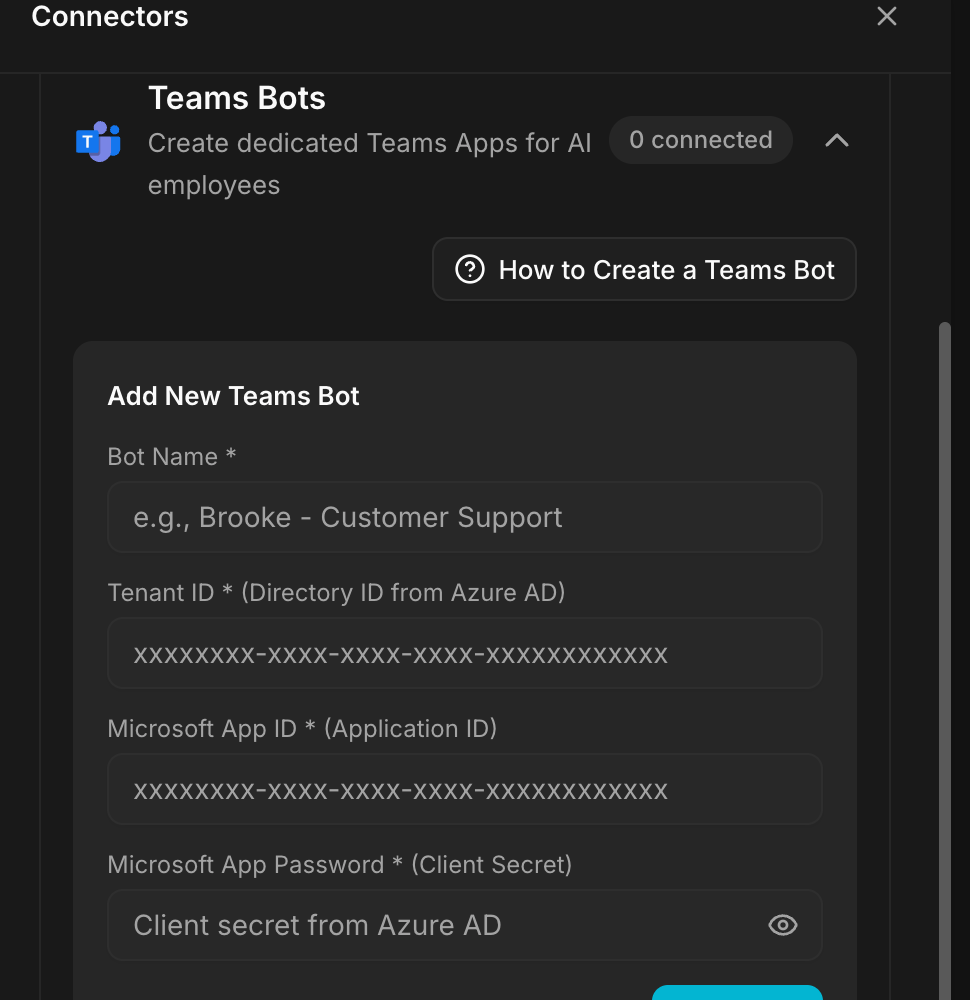
The product summarises it as a Quick Reference, and it is worth reading before you start:
| From your Azure AD app | In Geta.Team |
|---|---|
| Directory (tenant) ID | Bot Name |
| Application (client) ID | Assign to Employee |
| Client Secret (password) | Download Manifest (.zip) |
The form fields are Bot Name, Tenant ID, Microsoft App ID and Microsoft App Password, all four required, then Add Bot.
You also need an Azure subscription: step 3 creates a resource, on the Free pricing tier: and, for step 9, a Teams administrator.
Create the bot, step by step
1. Create an Azure AD App Registration
- Go to the Azure Portal → App Registrations.
- Click New registration.
- Enter a name, for example Brooke - Customer Support Bot.
- Under Supported account types, select Accounts in this organizational directory only (Single tenant).
- Leave the Redirect URI blank.
- Click Register.
- Copy the Application (client) ID and the Directory (tenant) ID.
2. Create a client secret
- In the app registration, go to Certificates & secrets.
- Click New client secret.
- Add a description, for example Bot Secret.
- Set the expiration to 24 months (recommended).
- Click Add.
Copy the Value immediately, it is shown once and never again. The Value is the secret; the Secret ID next to it is not.
3. Create the Azure Bot resource
- In the Azure Portal, choose Create Azure Bot.
- Fill in the Bot handle, a unique identifier.
- Select your Subscription and Resource group.
- For Pricing tier, select Free.
- Under Microsoft App ID, select Use existing app registration.
- Enter the App ID from step 1.
- Select Single Tenant as the app type.
- Click Review + create, then Create.
4. Configure the messaging endpoint
- In the new Bot resource, go to Settings → Configuration.
- Set the Messaging endpoint to:
https://YOUR-INSTANCE/api/teams-bot-events- Click Apply.
Use your own instance address. The exact URL is displayed in the How to Create a Teams Bot panel inside the product, copy it from there.
5. Enable the Microsoft Teams channel
- In your Azure Bot, go to Channels.
- Click the Microsoft Teams icon.
- Accept the Terms of Service.
- Under Messaging, select the appropriate message types.
- Click Apply.
6. Add API permissions (optional)
Only needed for proactive messaging, when the employee should be able to write first rather than only answer.
- Back in Azure AD → App registrations, select your app.
- Go to API permissions → Add a permission → Microsoft Graph.
- Add these Application permissions:
User.Read.All
TeamsActivity.Send- Click Grant admin consent.
7. Add the bot in Geta.Team
- In Settings → Connectors → Teams Bots, click + Add Bot.
- Enter the Bot Name, usually the employee's name.
- Paste the Tenant ID (Directory ID, step 1).
- Paste the Microsoft App ID (Application ID, step 1).
- Paste the Microsoft App Password (the client secret Value, step 2).
- Click Add Bot.
- Assign the bot to an employee.
8. Install the bot in Microsoft Teams
- Click the download button next to your bot in the list, this gives you
the manifest
.zip. - In Teams, go to Apps → Manage your apps.
- Click Upload an app → Upload a custom app.
- Select the downloaded
.zip. - Click Add.
- Start a conversation with the bot: it is now handled by your AI employee.
9. Deploy to the whole organisation (admin only)
To make the bot available to everyone without each person installing it:
- Go to the Teams Admin Center → Manage apps.
- Click Upload new app and select the same
.zipmanifest. - Go to Teams apps → Setup policies.
- Edit the Global (Org-wide default) policy.
- Under Installed apps, click Add apps, find your bot, add it.
- Click Save.
Policy changes may take up to 24 hours to reach all users.
Troubleshooting
"Invalid Microsoft App ID or App Password"
- Use the Directory (tenant) ID, not the Object ID.
- The client secret Value is not the Secret ID, use the Value.
- Check the secret has not expired.
- Confirm you selected Single tenant when creating the app registration.
"Upload custom app" is not available in Teams
Go to the Teams Admin Center → Teams apps → Permission policies and enable Upload custom apps for your organisation.
"manifestVersion property is missing"
Do not use the manifest from the Azure Portal, it is incomplete. Download the manifest with the button next to your bot in Geta.Team.
The bot does not respond to messages
- Check the messaging endpoint in Azure Bot → Settings → Configuration.
- Check the Microsoft Teams channel is enabled and healthy, green checkmark.
- Check an employee is actually assigned to the bot.
What breaks
The client secret has an expiry date, 24 months at most if you follow step 2. When it lapses the bot stops answering with no warning on the platform side. Write the date down the day you create it, this is what kills Teams bots long after a successful setup.