
Slack Bots
Give an employee its own Slack app, so it can be messaged in Slack under its own name.
Where
Dashboard sidebar → Settings → Connectors → Slack Bots.
What it does
A Slack bot is a Slack App of your own that represents one employee. Once connected, your team sends a direct message to that app in Slack, and the employee answers there.
One app per employee. The employee appears in Slack under its own name and its own avatar, not under a shared "Geta.Team" identity. Add a second bot for a second employee.
This is not Slack Impersonation. A bot posts as itself. Impersonation sends messages as a real connected Slack user. They are two separate connectors, configured separately.
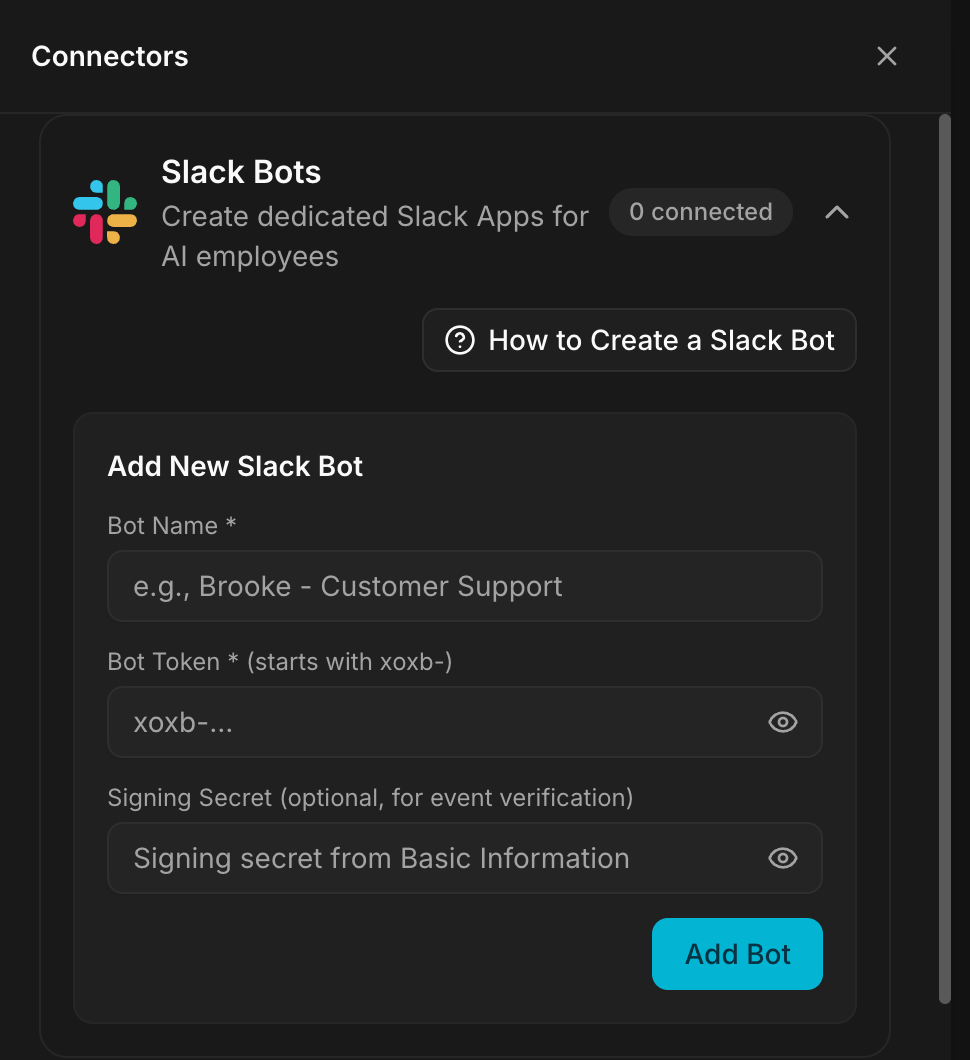
The row shows how many bots are connected (0 connected until you add one).
Expanding it gives you the How to Create a Slack Bot button, which repeats
these instructions inside the product, and the Add New Slack Bot form:
| Field | Required | What goes in it |
|---|---|---|
| Bot Name | yes | a label for you, usually the employee's name |
| Bot Token | yes | the Bot User OAuth Token, starts with xoxb- |
| Signing Secret | no | used to verify incoming Slack events |
Before you start
You need a Slack workspace where you are allowed to install apps. On many workspaces this means being an admin, or having an admin approve the app once it is created.
Keep the Geta.Team Connectors panel open in a second tab: you will come back to it at step 6, and the event URL you need at step 3 is displayed there.
Create the bot, step by step
1. Create a Slack App
- Go to api.slack.com/apps.
- Click Create New App.
- Choose From scratch.
- Enter an App Name. Name it after the employee, for example Brooke - Geta.Team, because this is what your team will see in Slack.
- Select your workspace and click Create App.
2. Add Bot Token Scopes
- Go to OAuth & Permissions in the left sidebar.
- Scroll to Scopes → Bot Token Scopes.
- Add these seven scopes:
chat:write
files:read
files:write
im:history
im:read
im:write
users:read
chat:write lets the employee answer, the im: scopes let it receive direct
messages, and the files: scopes let it send and read attachments.
3. Enable Event Subscriptions
This is what makes the bot receive direct messages. Without it, the bot can only speak when spoken to through the platform.
- Go to Event Subscriptions.
- Toggle Enable Events to On.
- Set the Request URL to your instance's Slack events endpoint:
https://YOUR-INSTANCE/api/slack-eventsUse your instance address, not the one from a screenshot. The exact URL for your workspace is displayed in the How to Create a Slack Bot panel inside the product, copy it from there.
- Wait for Slack to verify the URL.
- Under Subscribe to bot events, add
message.im. - Click Save Changes.
4. Enable App Home
Required for direct messages.
- Go to App Home in the left sidebar.
- In the Show Tabs section, enable the Messages Tab.
- Check Allow users to send Slash commands and messages from the messages tab.
Skip this and your team will see "Sending messages to this app has been disabled" when they try to write to the bot.
5. Install the app and collect the credentials
- Go back to OAuth & Permissions.
- Click Install to Workspace and authorize the app.
- Copy the Bot User OAuth Token. It starts with
xoxb-. - Go to Basic Information and copy the Signing Secret.
6. Add the bot in Geta.Team
- Back in Settings → Connectors → Slack Bots, click + Add Bot.
- Enter the Bot Name, usually the employee's name.
- Paste the Bot Token and the Signing Secret.
- Click Add Bot.
- Assign the bot to an employee. A bot that is not assigned belongs to nobody and answers nobody.
7. Customise the bot's appearance (optional)
- In Slack, go to Basic Information → Display Information.
- Set the App name, the Short description and the Long description.
- Upload an App icon. Use the employee's avatar, so the person in Slack sees the face they see in the platform.
- Click Save Changes.
8. Keep the bot always online (optional)
- Go to App Home.
- Check Always Show My Bot as Online.
The bot then shows as online 24/7 in Slack, so nobody wonders whether it is listening.
Troubleshooting
"Sending messages to this app has been disabled." Step 4 was skipped. Enable the Messages Tab in App Home and allow users to send messages from it.
The bot never answers a direct message.
Check step 3: Enable Events must be on, the Request URL must be verified by
Slack, and message.im must be listed under Subscribe to bot events. A
Request URL that points to another instance verifies fine and delivers nothing.
Slack rejects the token when you click Add Bot.
The token must be the Bot User OAuth Token, starting with xoxb-. A token
starting with xoxp- is a user token and belongs to Slack Impersonation, not
here.
You added a scope and the bot stopped working. Slack does not apply new scopes to an already installed app. Go back to OAuth & Permissions and click Install to Workspace again, then use the new token.
The right employee does not answer. The bot exists but is assigned to another employee, or to none. Check the assignment in the connector row.
What breaks
The Slack app belongs to your Slack workspace, not to Geta.Team. If someone deletes it there, or if the token is revoked, the employee goes silent with no warning on the platform side. Re-issue the token and update the bot.