
Microsoft Office 365
Connect Outlook Mail, Calendar and OneDrive: no setup, or your own Azure AD app.
Where
Dashboard sidebar → Settings → Connectors → Microsoft Office 365.
What it does
Connects Outlook Mail, Calendar and OneDrive to your employees.
The row reads Centralized, and the connector says why: Using GetATeam's
centralized Microsoft app. No setup required. This is the one connector
that needs nothing registered anywhere: you click, you sign in to Microsoft,
you are done.
Organisations that would rather not go through a shared Microsoft app can supply their own, see Use your own Azure AD app below.
Connect an account
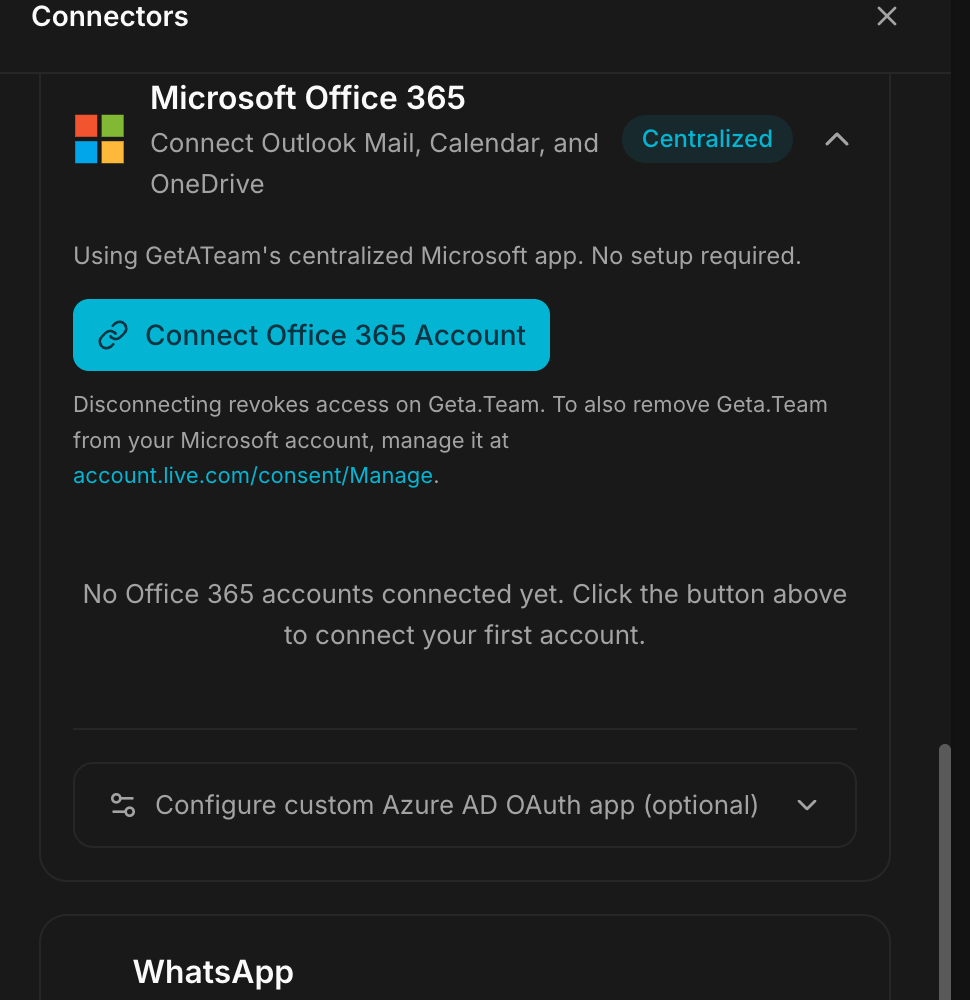
- Expand Microsoft Office 365.
- Click Connect Office 365 Account.
- Sign in to Microsoft and accept the requested access.
- The account appears in the list.
Until then the connector says: No Office 365 accounts connected yet. Click the button above to connect your first account.
Disconnecting. The product is explicit about what disconnecting does and does not do: it revokes access on Geta.Team, but to also remove Geta.Team from your Microsoft account, manage it at account.live.com/consent/Manage.
Use your own Azure AD app
Optional. At the bottom of the connector, Configure custom Azure AD OAuth app (optional) replaces the centralized app with credentials of your own: Use your own Azure AD app credentials instead of the centralized app.
Existing proxy connections are reset when you save. Accounts connected through the centralized app have to be reconnected afterwards. Do this before connecting people, not after.
The form takes Application (Client) ID, Client Secret and Directory (Tenant) ID, with a Save custom OAuth app button.
1. Register an Azure AD application
- Go to the Azure Portal → App Registrations.
- Click New registration.
- Enter a name, for example Geta.Team Office 365 Integration.
- Under Supported account types, select Accounts in this organizational directory only (Single tenant).
- Under Redirect URI, select the Web platform and enter:
https://YOUR-INSTANCE/api/office365/oauth/callback- Click Register.
Use your own instance address. The exact URL is shown in the How to create your own Azure AD OAuth app panel inside the product, copy it from there.
2. Copy the credentials
From the app Overview page, copy the Application (client) ID and the Directory (tenant) ID.
3. Create a client secret
- Go to Certificates & secrets.
- Click New client secret, add a description, choose an expiry.
- Click Add.
- Copy the Value, not the Secret ID, it is shown once only.
4. Configure API permissions
Go to API permissions → Add a permission → Microsoft Graph → Delegated permissions, and add:
openid
profile
email
offline_access
User.Read
Mail.ReadWrite
Mail.Send
MailboxSettings.Read
Calendars.ReadWrite
Files.ReadWrite
Sites.ReadWrite.All
Click Add permissions, then Grant admin consent for [your organisation] if the button is available.
5. Save it in Geta.Team
Enter the three credentials in the connector and save.
Sending from an alias
The Office 365 Mail skill can send from an alias or a shared mailbox: send,
reply and draft take --from and --name. Exchange decides whether the account
is allowed to use that address; if it is not, you see Microsoft's exact error
(for example ErrorSendAsDenied) instead of a generic failure. The display name
of an alias stays the mailbox's own name; to send reliably under another name, use
a shared mailbox with Send As permission. Microsoft 365 connectors (Outlook,
OneDrive, SharePoint, Word, Excel, PowerPoint) also work on Community Edition;
Teams stays Enterprise.
Troubleshooting
A user is refused at sign-in with a consent error. On a custom Azure AD app, admin consent was not granted, or a permission was added after consent. Re-grant it from the Azure Portal.
The redirect fails after the Microsoft login screen.
The Redirect URI must match your instance exactly, https:// included, no
trailing slash, registered on the Web platform.
Everyone was disconnected after a change of settings. Saving a custom OAuth app resets existing connections. Reconnect the accounts.
Accounts stop working months later. The Azure client secret expired. Create a new one and update the connector. The centralized app is not affected by this, it is one of the reasons to stay on it.
What breaks
On the centralized app, nothing on your side can expire, which is why it is the default. Once you move to your own Azure AD app, you own the secret and its expiry date, and the day it lapses, mail, calendar and OneDrive stop together.