
Teams Impersonation
Let employees send Teams messages as a real connected user, using your Azure AD app.
Where
Dashboard sidebar → Settings → Connectors → Teams Impersonation.
What it does
Impersonation lets an employee send Teams messages as a real user who connected their account, rather than as a bot with its own identity.
This is the opposite choice from Teams Bots.
| Teams Bots | Teams Impersonation | |
|---|---|---|
| Messages appear as | the bot, with its own name | the connected human user |
| Set up per | employee, one Azure Bot each | organisation, one Azure AD app total |
| Azure resources | App Registration and Azure Bot | App Registration only |
| Needs | a manifest installed in Teams | delegated permissions and admin consent |
Configured once for the organisation: the row reads Not Configured until you
enter the three credentials.
The form
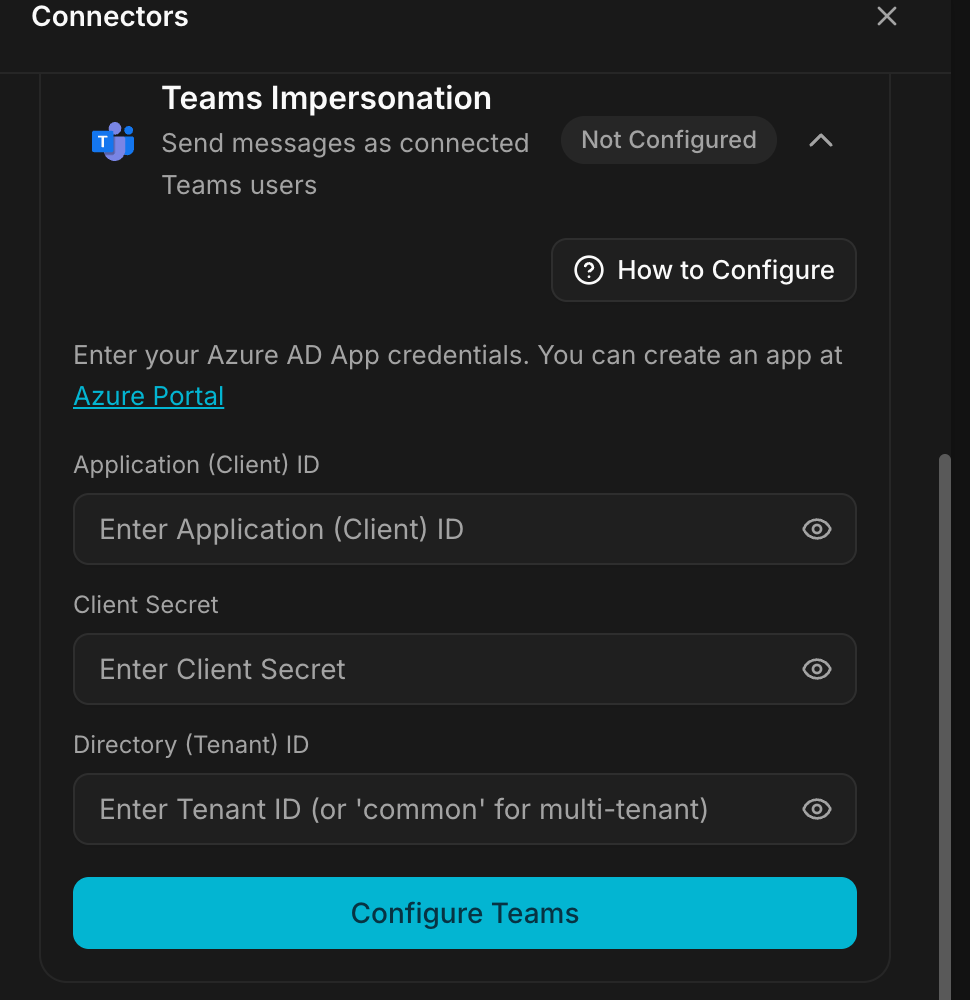
Expanding the connector gives you How to Configure, which repeats these instructions inside the product, and three fields:
| Field | What goes in it |
|---|---|
| Application (Client) ID | from the app's Overview page in Azure |
| Client Secret | the Value of a secret you create |
| Directory (Tenant) ID | also on the Overview page |
The button is Configure Teams.
Before you start
You need an Azure AD tenant where you can register an application, and an administrator able to grant consent, step 3 cannot be completed without one. Get that person lined up before you start, it is the usual place where this setup stalls.
Configure, step by step
1. Register an Azure AD application
- Go to the Azure Portal → App Registrations.
- Click New registration.
- Enter a name, for example Geta.Team Teams Integration.
- Under Supported account types, select Accounts in this organizational directory only (Single tenant).
- Under Redirect URI, select the Web platform and enter:
https://YOUR-INSTANCE/api/teams/oauth/callback- Click Register.
Replace YOUR-INSTANCE with your own address. The exact URL is displayed in
the How to Configure panel inside the product, copy it from there.
2. Collect the credentials
- On the Overview page, note the Application (client) ID and the
Directory (tenant) ID. For a multi-tenant setup,
commoncan be used instead of the tenant ID. - In the left sidebar, open Manage → Certificates & secrets.
- Click New client secret, add a description, choose an expiry.
- Click Add and copy the Value.
The Value is the client secret, not the Secret ID shown next to it. It is only readable right after creation.
3. Configure API permissions
- Go to API permissions.
- Click Add a permission → Microsoft Graph → Delegated permissions.
- Add these ten permissions:
Chat.Create
Chat.ReadWrite
ChatMessage.Read
ChatMessage.Send
Files.Read
Files.ReadWrite
offline_access
Sites.Read.All
User.Read
User.ReadBasic.All
Click Add permissions after each selection.
Admin consent is required. An administrator must go to Azure Portal → Enterprise Applications → your app → Permissions and click Grant admin consent for [organization]. Until this is done, users are refused when they try to connect their account.
4. The webhook (optional)
To receive incoming Teams messages, a subscription is needed. It is created automatically when a user connects their account, there is nothing to configure by hand. For reference, the endpoint is:
https://YOUR-INSTANCE/api/teams-events5. Configure Geta.Team
Back in Settings → Connectors → Teams Impersonation, enter the Application (Client) ID, the Client Secret and the Directory (Tenant) ID, then click Configure Teams.
Users then connect their own Teams account from this connector. Nobody is impersonated without having authorised the app themselves.
Troubleshooting
A user gets a consent error when connecting their account. Admin consent from step 3 was never granted, or a permission was added after the consent was given. Re-grant consent whenever the permission list changes.
The redirect fails after the Microsoft login screen.
The Redirect URI of step 1 must match your instance exactly, https://
included, with no trailing slash, and be registered on the Web platform.
Everything worked, then everyone stopped at once. The client secret expired. Azure secrets always have an expiry date. Create a new one and paste it in the connector. Note the expiry date somewhere you will actually see it.
Messages can be sent but none are received. The subscription of step 4 is created at account connection. Disconnect and reconnect the account to have it recreated.
What breaks
The app registration is yours, in your tenant. Deleting it, or letting the secret expire, cuts every impersonated user simultaneously. The client secret expiry is the single most common cause of a Teams integration dying months after a successful setup.