
Discord
Connect a Discord bot so an employee can read and answer in your server's channels.
Where
Dashboard sidebar → Settings → Connectors → Discord.
What it does
You create a bot application on the Discord Developer Portal, invite it to your server, paste its token here, and assign it to an employee. The employee then reads and answers in the channels you allow.
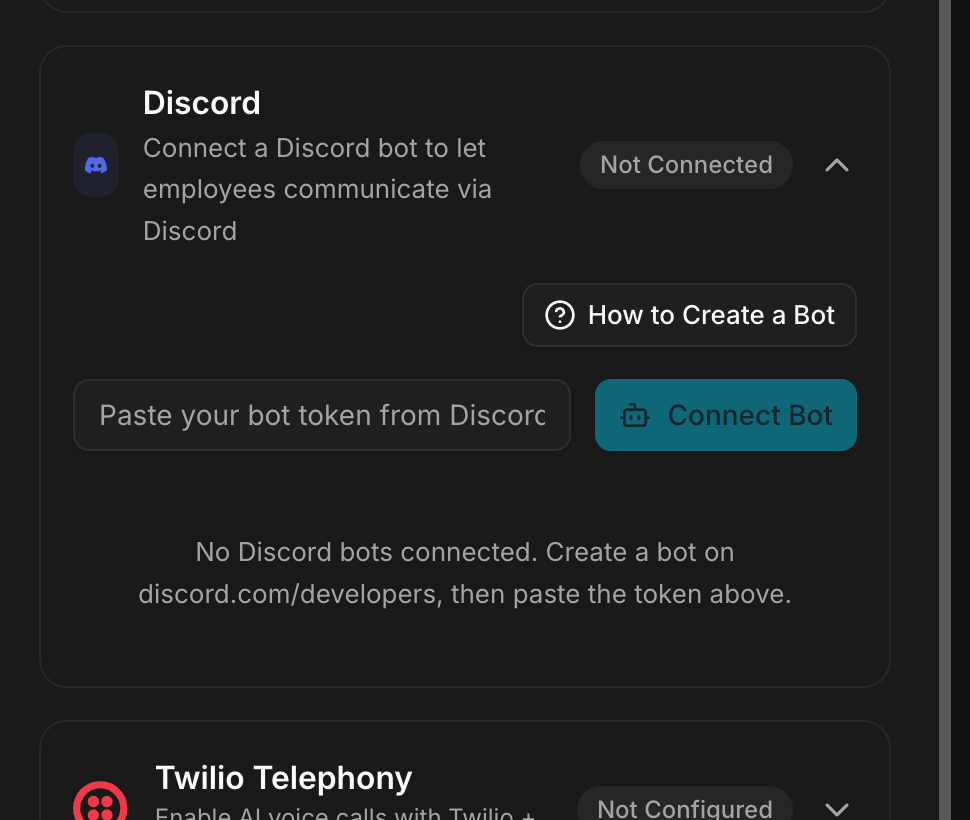
The row reads Not Connected until a bot is added. Expanding it gives you
How to Create a Bot, a field for the token and a Connect Bot button,
with the reminder: No Discord bots connected. Create a bot on
discord.com/developers, then paste the token above.
Create the bot, step by step
1. Create a Discord server
Skip this if you already have one.
- Open Discord, app or discord.com.
- Click the + button in the left sidebar.
- Choose Create My Own, then For me and my friends.
- Name the server and click Create.
2. Create a bot application
- Go to discord.com/developers/applications.
- Click New Application in the top right.
- Give it a name and click Create.
3. Enable the Message Content Intent
Without this the bot sees that a message exists but cannot read what it says.
- In your application, open the Bot section in the left menu.
- Scroll to Privileged Gateway Intents.
- Enable Message Content Intent.
- Click Save Changes.
4. Copy the bot token
- Still in the Bot section, click Reset Token.
- Copy the token that appears and keep it safe.
The token is shown once. Anyone holding it controls the bot: if it leaks, click Reset Token again to invalidate the old one.
5. Invite the bot to your server
- Go to OAuth2 → URL Generator in the left menu.
- Under Scopes, check bot.
- Under Bot Permissions, check:
Send Messages
Read Message History
Attach Files
View Channels- Copy the URL generated at the bottom and open it in your browser.
- Select your server and click Authorize.
6. Connect the bot in Geta.Team
- Paste the token in the Discord connector and click Connect Bot.
- Click Assign next to the bot to attach it to an employee.
- Choose which channels the bot should monitor, or enable Allow All.
Good to know
- To get a channel ID: enable Developer Mode in Discord (Settings → Advanced), then right-click a channel and choose Copy Channel ID.
- The bot also receives direct messages from users who share a server with it, not only channel messages.
- The bot's name and avatar are customised in the Developer Portal, not here. Use the employee's avatar so the two match.
Troubleshooting
The bot is online but never answers in a channel. Either the channel is not in the monitored list and Allow All is off, or the Message Content Intent of step 3 was never enabled, the bot then receives messages it cannot read.
The bot does not appear in the server. Step 5 was not completed, or it was authorised on a different server. Generate the invitation URL again and check which server you select.
Connect Bot refuses the token. The token was reset after you copied it, which invalidates the previous one. Reset it once more and paste the new value immediately.
The bot answers but cannot send files. Attach Files was not checked in the bot permissions. Re-generate the invitation URL with the permission added and authorise it again.
What breaks
The application lives in your Discord Developer Portal. Resetting the token there, or removing the bot from the server, cuts the channel silently, the connector still lists the bot as connected.